
I’ve seen so many green curry paste recipes that are just completely wrong or so far from a real Thai green curry that it amazes me. Some of the ingredients needed to make this paste are hard to come by so I can understand that things might have to be changed but once you do that it’s no longer authentic. If you can find all the ingredients then my Thai green curry recipe will give you the authentic taste and flavour you are looking for.
Not only are some of the ingredients hard to find, it takes quite a long time to make and it’s pretty tiring as well! This is why there are so many pre-made curry pastes which you can buy at your local Asian supermarket.
Pre-made curry pastes don’t taste quite as good as a freshly made curry paste but I still use them quite often. Especially when I have to feed hundreds of people at a festival! As long as you have a really good green curry recipe. It still will taste fantastic!

At the end of the post I’ll recommend which green curry paste to buy if you don’t want to make your own every time. There are lots of different brands of green curry paste that you can buy but there is one in particular that is way better than the rest! Anyway, before you think about buying Thai green curry paste, you really should try making your own, at least once!
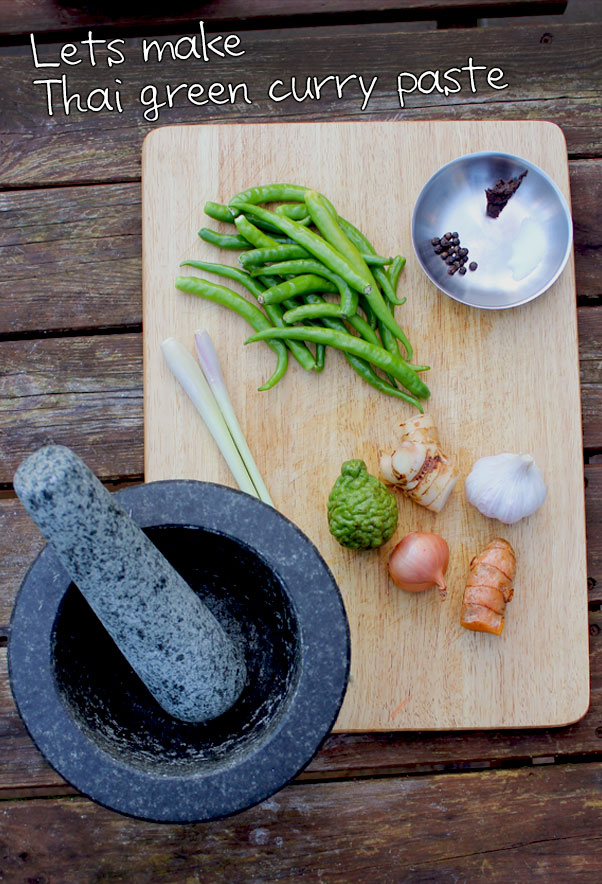
So If you want it to follow my Thai green curry recipe, here is everything you will need:
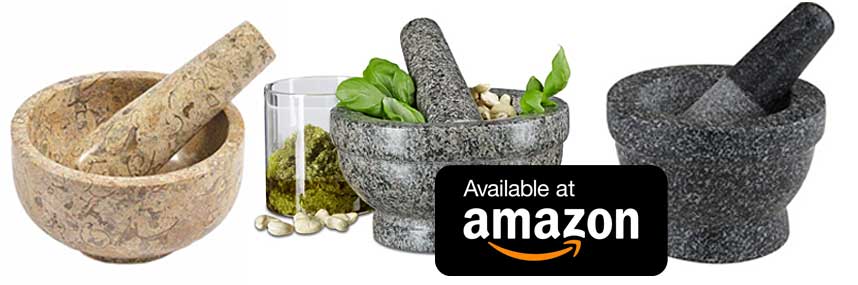
Pestle and Mortar?
If you want to make any kind of curry paste then a pestle and mortar is an essential piece of equipment. It’s not just Thai food though. If you have a pestle and mortar then you can make your own guacamole, pesto, Chimichurri sauce plus many other foods from all around the world.
If you haven’t used one before, don’t worry, it’s not hard but it can be quite tiring to begin with. Even after using one since I was a child it still makes my arm ache! Have a look at my video below if you want to see my pestle and mortar technique.
There are lots of different sizes and types of pestle and mortar. Personally I use a granite one as that’s the traditional one that I have used in Thailand since I first started cooking. The good news is they are not expensive! You can buy a pestle and mortar online really cheaply. I highly recommend getting one. Even if you don’t use it often it looks good sat in the corner of your kitchen!
Ingredients
- 20g shallot
- 4 cloves of garlic
- 2 stalks of lemon grass
- 20g of galangal
- 30 pepper corns
- 5g fresh turmeric
- 10 slices of kaffir lime skin
- 1 teaspoon of shrimp paste
- Half a teaspoon of salt
Instructions
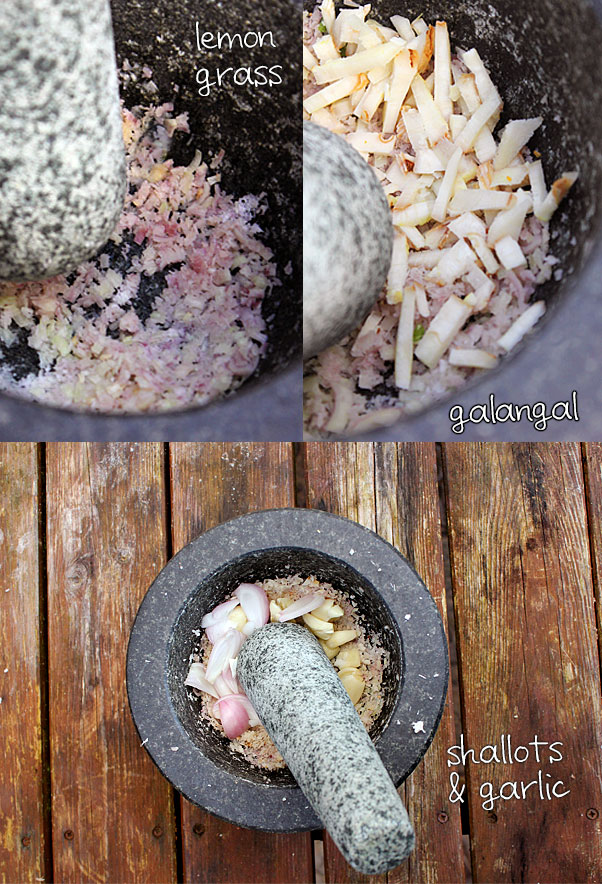
- First of all you need to cut up the lemon grass, galangal, shallots and turmeric into small pieces. You don’t need to dice everything to finely but bear in mind that you will be using a pestle and mortar to grind it all up into a paste. For that reason, you may want to dice everything up more finely to save time later on.
- Peel and slice the kaffir lime skin and then we’re ready to start the hard bit!
- The first thing to put into the mortar is the lemon grass. Begin grinding and pounding it until it starts breaking down. When the lemon grass has started to break down it’s time to add the galangal and continue pounding away. After a few minutes you’ll see that galangal has begun to break down. Now it’s time to add the shallots and garlic and continue pounding away.
- Now it’s time to add the green Thai bird’s eye chillies. This is where the green colour comes from. They have a unique flavour and if you try and use a different type of chilli it’s going to have a big impact on the flavour. If you don’t like your food too spicy you can try de-seeding some of the chillies. Most of the heat from a chilli comes from the seeds. Really though, if you don’t like spicy food then you probably shouldn’t be trying to make a Thai green curry! Green curry is meant to be spicy.
I’ve seen one famous TV chef replace the chillies with coriander leaves. Apparently this helps make the curry look green. Please, please don’t do that!!! Trust me, you wouldn’t get away with that in Thailand! Coriander definitely doesn’t belong in a Thai green curry paste!
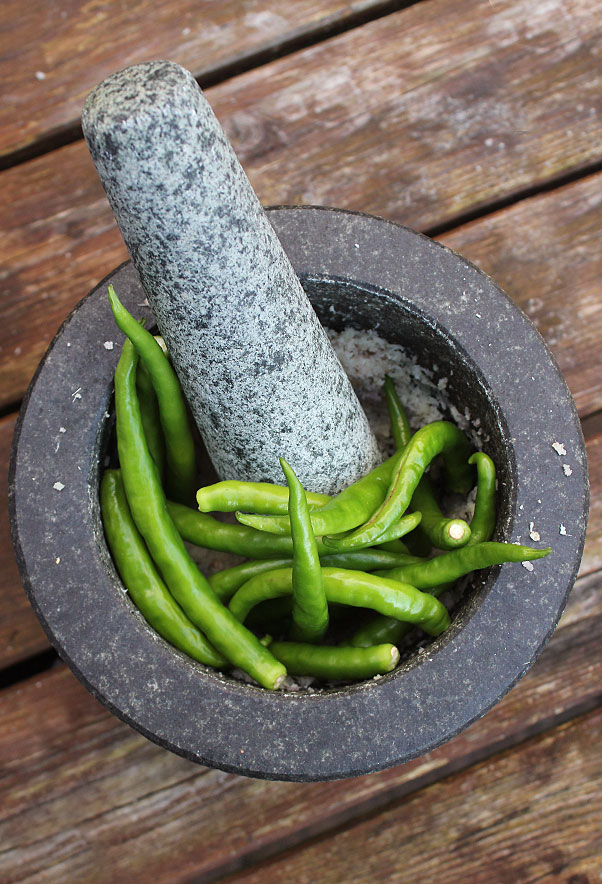
It might take you a good 10 minutes or more to break the chillies down into something that resembles a paste. It will depend on your technique, the pestle and mortar and your stamina!
- Once the chillies have been broken down it’s time to add the turmeric. The fresh yellow turmeric adds flavour but also adds a slight yellow tinge to the curry paste. Once once it’s all ground in, it really makes the green colour a lot brighter.
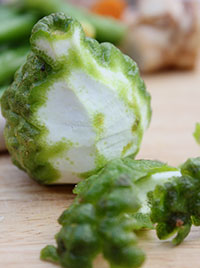
- Next it’s time for one of the most important ingredients, the kaffir lime skin. This is going to be the deal breaker for most people. It’s really hard to find if you’re not in Thailand. Although some Asian or Thai shops may have them, they are usually quite expensive.
We brought these back from Thailand in our luggage! The smell is just unbelievably fragrant. If you go to Thailand I recommend bringing some back with you. You can put them in your freezer and keep them for the rare occasion when you want to make your own green curry paste.
If you haven’t got the kaffir lime skin then your curry paste is going to be missing a really important ingredient.
There is no substitute for kaffir lime skin.
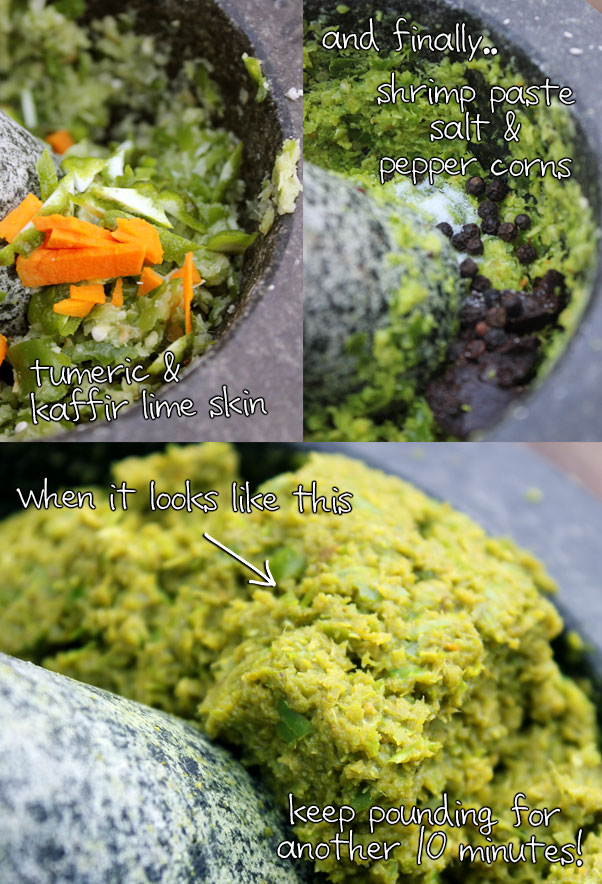
- By now you’re arm is probably aching and you’re ready to stop. It may look almost ready but you’re still a good 10 minutes away. If you’re arms starting to ache you can always have a rest. If you’ve managed to get this far you may as well go all the way and grind the paste down even finer!
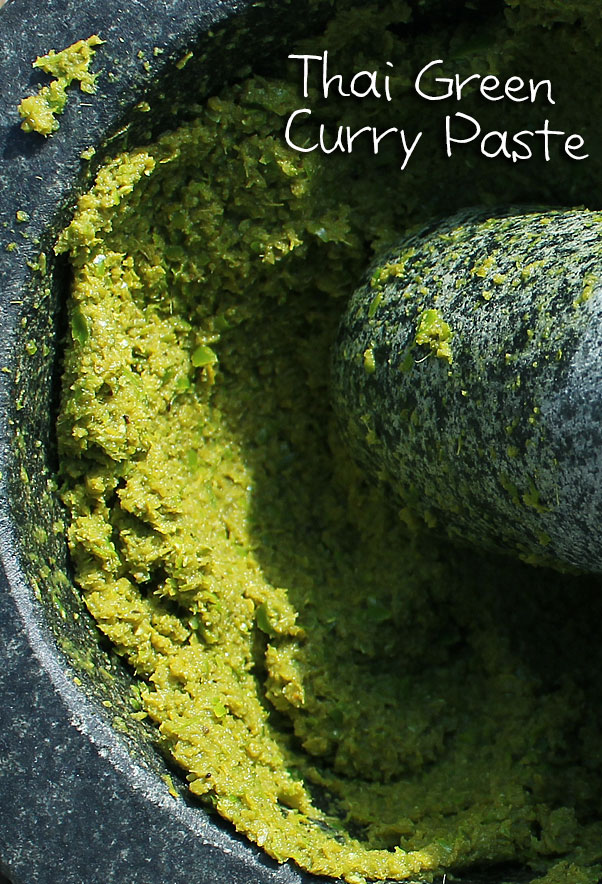
This is what your curry paste should look like when you’re done. If in doubt just carry on for another 10 minutes 🙂
Summary
- Chop the lemon grass in to small pieces
- Chop the galangal in to small pieces
- Chop the shallots in to small pieces
- Slice and peel the kaffir lime skin
- Chop the turmeric in to small pieces
- Put the lemon grass into the mortar and begin grinding and pounding it down
- When the lemon grass has started to break down add the galangal and continue
- When the galangal has started to break down add the shallots and garlic and continue
- After another few minutes of pounding add the chillies
- Continue pounding until the chillies start to break down (this may take between 10-20 minutes)
- Next add the turmeric and kaffir lime skin and continue pounding
- Last to go in are the pepper corns, salt and shrimp paste
- Continue until everything becomes a paste (see pictures)
FAQ
Can I use a blender instead of a pestle and mortar?
Yes you can. but your curry paste won’t taste as good.
Can I substitute the kaffir lime skin for something else?
No. If you haven’t got any kaffir lime skin don’t even attempt to make your own curry paste. Wait until you can get hold of some.
Can I substitute the chillies for something else?
No, I’m afraid not. The Thai bird eye chillies are what gives the curry it’s flavour and colour.
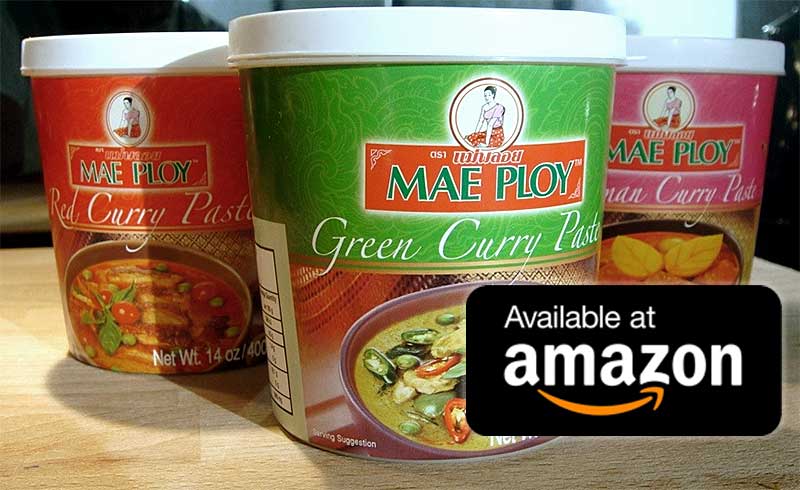
Thai Green Curry Paste – Where to Buy?
Now that you see how time consuming it is to make your own curry paste you may be having second thoughts. I really recommend you try making your at least once. It really is rewarding!
If you’re eat green curry often though, you’re going to need to buy a curry paste. I can only recommend one brand and that is Mae Ploy Thai Green Curry Paste. I’ve tried all the different brands and I can say that Mae Ploy gives you the most authentic flavour.
Just checking that the 30 Pepper corns in the ingredient list is the Thai bird eye chillies?
Thanks
No, they are actual pepper corns!
You will be hitting the ceiling if you use 30 Thai chillies !
Your recipe does not mention the quantity of chillies. How many do we use
It depends on how spicy you want your curry to be and how powerful your chillies are. There is no sctrict rule. 🙂
Do you use all this paste per one can of coconut milk?
yes 🙂